This day and age it is very important to secure your passwords. Reusing the same password is not safe. There is an open source option to do both of those. I am going to show you how to self host your own passwords and keep them safe wherever you want to instead of depending on 3rd parties or paying money.
The instructions below are for Debian Linux however, Passbolt can be installed on any major OS.
Install Passbolt
- Start by downloading the Repository curl -LO https://download.passbolt.com/ce/installer/passbolt-repo-setup.ce.sh
- Download passbolt’s SHA512SUM for installation script
curl -LO https://github.com/passbolt/passbolt-dep-scripts/releases/latest/download/passbolt-ce-SHA512SUM.txt - Ensure the script is valid and execute:
sha512sum -c passbolt-ce-SHA512SUM.txt && sudo bash ./passbolt-repo-setup.ce.sh || echo “Bad checksum. Aborting” && rm -f passbolt-repo-setup.ce.sh - Install passbolt official linux package: sudo apt install passbolt-ce-server
- Configure mariadb
- Create empty database and grant permission yes
- Provide creds for admin user with enough privileges, I used root
- Create mariadb user with reduced permissions for passbolt to connect keep these credentials in handy as they will be used during initial setup
- Name the database
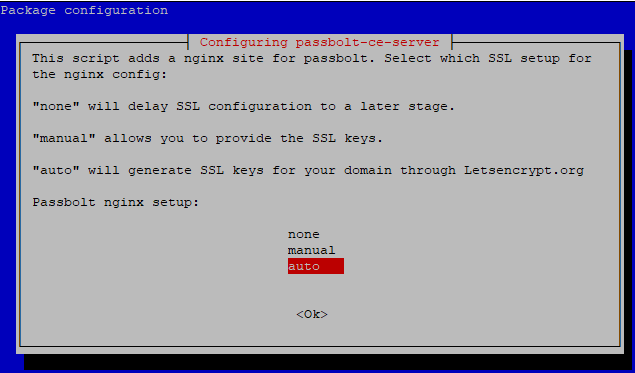
- Configure nginx for Serving HTTPS
- You can choose to do it later, manual, or automatically using Let’s Encrypt
- Prereques for let’s encyrpt: ensure port forwarding off port 80 to your server and ensure dns records are setup correctly with domain.
- You can choose to do it later, manual, or automatically using Let’s Encrypt

Configure passbolt
1.Connect to your hosted machine via your browser to the hostname or ip address
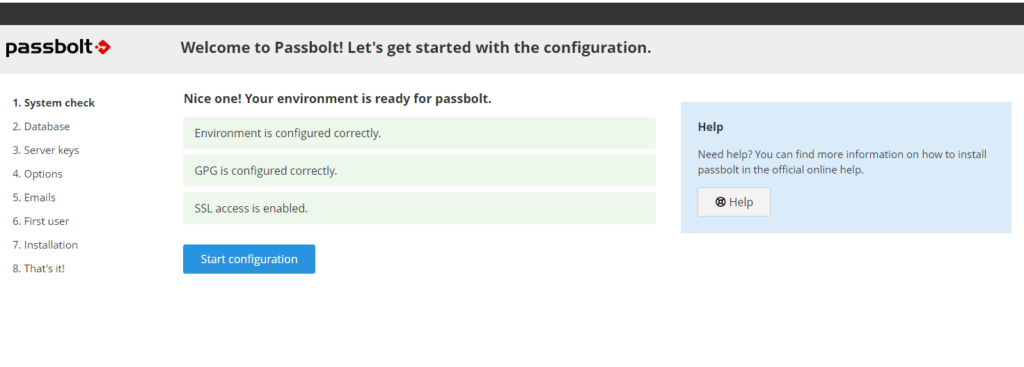
2. System Check
The first page of the wizard will tell you if your environment is ready for passbolt. Solve issues if any and click on “Start configuration” when ready.

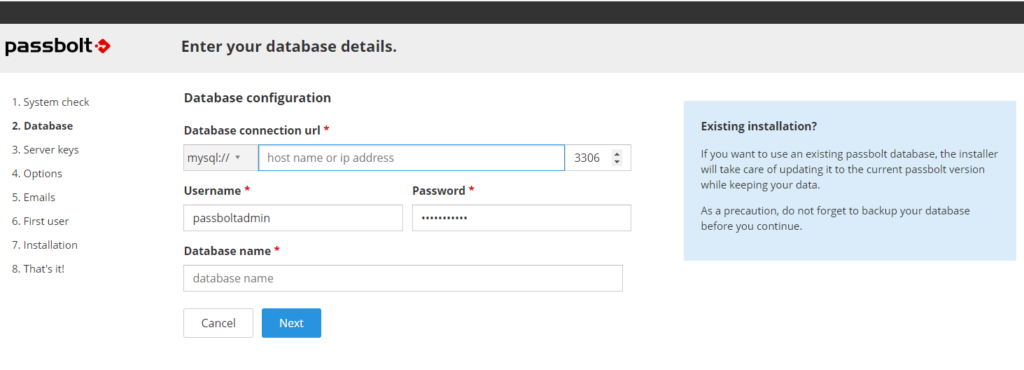
3. Database
This step is about telling passbolt which database to use. Enter the host name, port number, database name, username and password.
Enter the username and password that was setup during the initial database wizard use 127.0.0.1 for the database url if your database is on the same server as Passbolt otherwise you may have database connectivity issues.

4. GPG Key
In this section you can either generate or import a GPG key pair. This key pair will be used by passbolt API to authenticate itself during the login.
5. Mail Server (SMTP)
Enter smtp server details so that you can receive email notifications.
6. Preferences
The wizard will then ask you what preferences you prefer for your instance of passbolt. The recommended defaults are already pre-populated but you can also change them if you know what you are doing.
7. First User Creation
You need to create the first admin user account. This first admin user is probably you, so enter your details and click on next.
Almost Done
Configure your administrator account
Download the passbolt plugin and install for each web browser you will use passbolt for. You will need to download and install the passbolt plugin before you are able to access the browser and then navigate to the web based setup
Create a new key
This will be the master password so this is very important and is a good idea to use a strong password
Download your recovery kit
This step is essential. Your key is the only way to access your account and passwords. If you lose this key (by breaking or losing your computer and not having a backup for example), your encrypted data will be lost even if you remember your passphrase.
Define your security token
Choosing a color and a three characters token is a secondary security mechanism that helps you to mitigate phishing attacks. Each time you are performing a sensitive operation on passbolt, you should see this token and then now that you are preforming legitimate actions.
Complete
Your self hosted passbolt server is now complete and ready to be used. There are a number of recommended security measure to use such as turning on mfa. Configure what is most useful for your environment and enjoy a secure self hosted password manager! If you would like any additional resources or assistance with an additional feature please see the passbolt user guide at https://www.passbolt.com/docs/user/

Leave a Reply